DIY: Transform Your Old Clothes into Monster-Inspired Streetwear

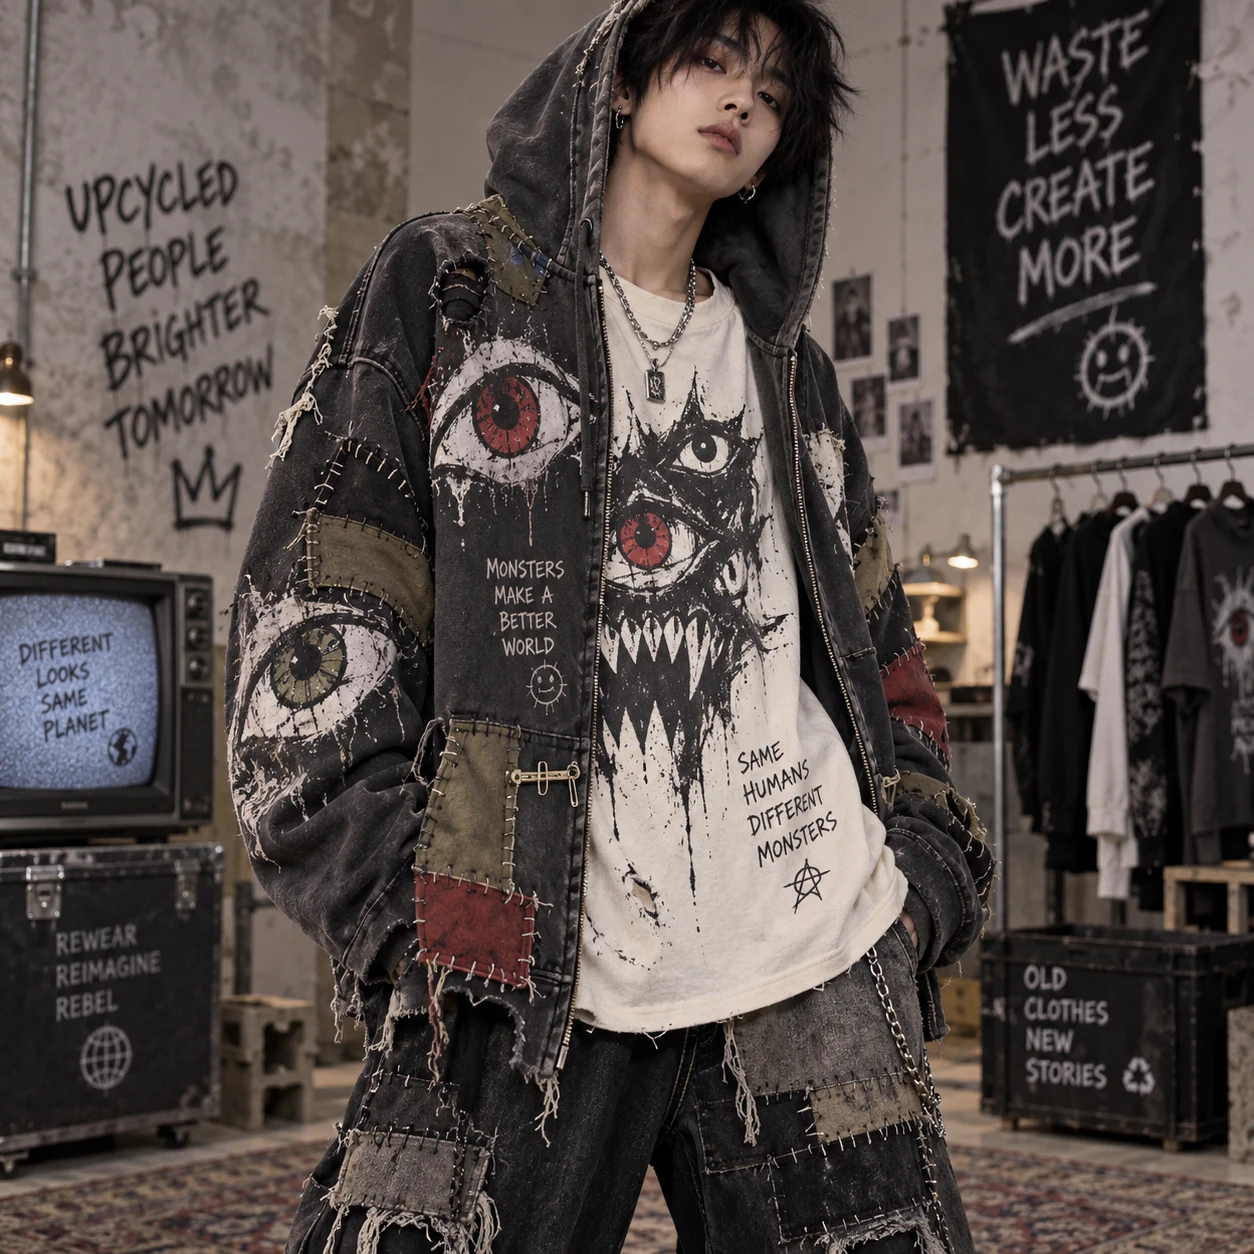
That old hoodie at the back of your closet may be one set of monster eyes away from becoming your new favorite layer. With a few simple supplies, you can upcycle old clothes into wearable monster-inspired streetwear without buying a whole outfit or needing advanced sewing skills.
Start with a garment you already like wearing, choose one clear monster theme, and add details gradually. A graphic T-shirt can become a bold focal point; an oversized hoodie offers room for layered colors, patches, and texture. The goal is character, not a costume: make a piece that still feels comfortable with your everyday jeans, cargos, and sneakers.
Choose Clothes and Plan Your Monster Look
Choose a sturdy garment with a silhouette you enjoy, then decide on a monster theme before you alter it. A little planning helps the motifs, colors, and placement feel intentional rather than crowded.
Look through your closet for an oversized hoodie, a roomy graphic T-shirt, a denim jacket, or durable sweatpants. Cotton and cotton blends are often easy to paint and work with, while stretchy knits can shift under a brush or iron. Check the seams, cuffs, and fabric for thinning or holes; small imperfections can add distressed character, but a weak seam may not hold up to extra stitching or wear.
Pick a direction that suits your taste: swamp creature, fuzzy beast, stitched-up monster, or a strange one-eyed character. Then choose two or three colors and a small set of motifs. A single oversized eye on a sleeve, claw marks near a hem, or teeth peeking from a pocket can be more effective than covering every panel.
- For a bold graphic: Use a dark T-shirt as a base for bright eyes or a toothy mouth.
- For a layered look: Put patches on the chest or sleeves of a roomy hoodie.
- For subtle detail: Add small claws, scales, or a monster tag near a pocket or cuff.
Before painting or cutting, lay the garment flat and mark the design lightly with tailor’s chalk. Try it on, or hang it up and view it from a few steps away. That quick check can catch an eye placed too close to a seam or a graphic that disappears under a hood.
Gather Materials and Prep Your Garments
Gather fabric-safe materials, basic tools, and a clean work surface before starting. Wash and dry the garment first so paint and patches meet clean fabric and you can judge its true fit.
You may already have most of what you need: fabric paint, brushes or a sponge, iron-on patches, needle and thread, scissors, chalk, and scrap cardboard. Put cardboard inside a T-shirt or hoodie to keep paint from bleeding through to the back. Cover your table with a washable cloth or paper, and keep a scrap of similar fabric nearby for testing color and technique.
Read the paint or patch label before use. Fabric paints vary: some need heat-setting, while others cure by air-drying. Iron-on patches also have different temperature and pressing instructions. Test the iron on an inconspicuous area first, particularly if the garment is synthetic, elastic, or printed. Use ventilation when product directions call for it.
- Wash without fabric softener if the product instructions recommend it.
- Let the garment dry fully and smooth out wrinkles.
- Check the planned design against seams, pockets, and any existing print.
- Keep a scrap cloth between an iron and the garment when required by the patch directions.
Common mistake: Painting directly onto an unwashed garment can leave uneven coverage if oils or residue sit on the fabric. Prep first, and test your paint in a hidden spot. It takes a few minutes and may save the front of a favorite hoodie.
Add Monster-Inspired Graphics and Details
Use fabric paint, iron-on patches, stitching, or a mix of techniques to add monster motifs to your garment. Begin with the largest graphic, then add smaller details that support it.
For painted designs, sketch a simple shape with chalk, place cardboard inside the garment, and apply thin layers of fabric paint. Thin coats are easier to control and less likely to leave a stiff, cracked patch than one heavy application. Let each layer dry as directed before adding outlines, highlights, or extra colors. A sponge can create mottled fur or scales; a fine brush works well for pupils, teeth, and scratch lines.
Iron-on patches offer a no-sew route to expressive eyes, fangs, or creature emblems. Place the patch, cover it as instructed, and press for the recommended time and temperature. Let it cool before checking the edges. If a corner lifts, follow the product directions for re-pressing; decorative stitching around the edge can add security and a handmade finish.
Other details can be simple. Sew a few jagged fabric scraps onto a pocket, use contrasting thread to trace a crooked mouth, or add small felt triangles as scales. Keep rough or raised embellishments away from spots that rub against skin. For a more wearable result, repeat one color or shape in two places, such as a patch on the chest and matching claw marks on a sleeve.
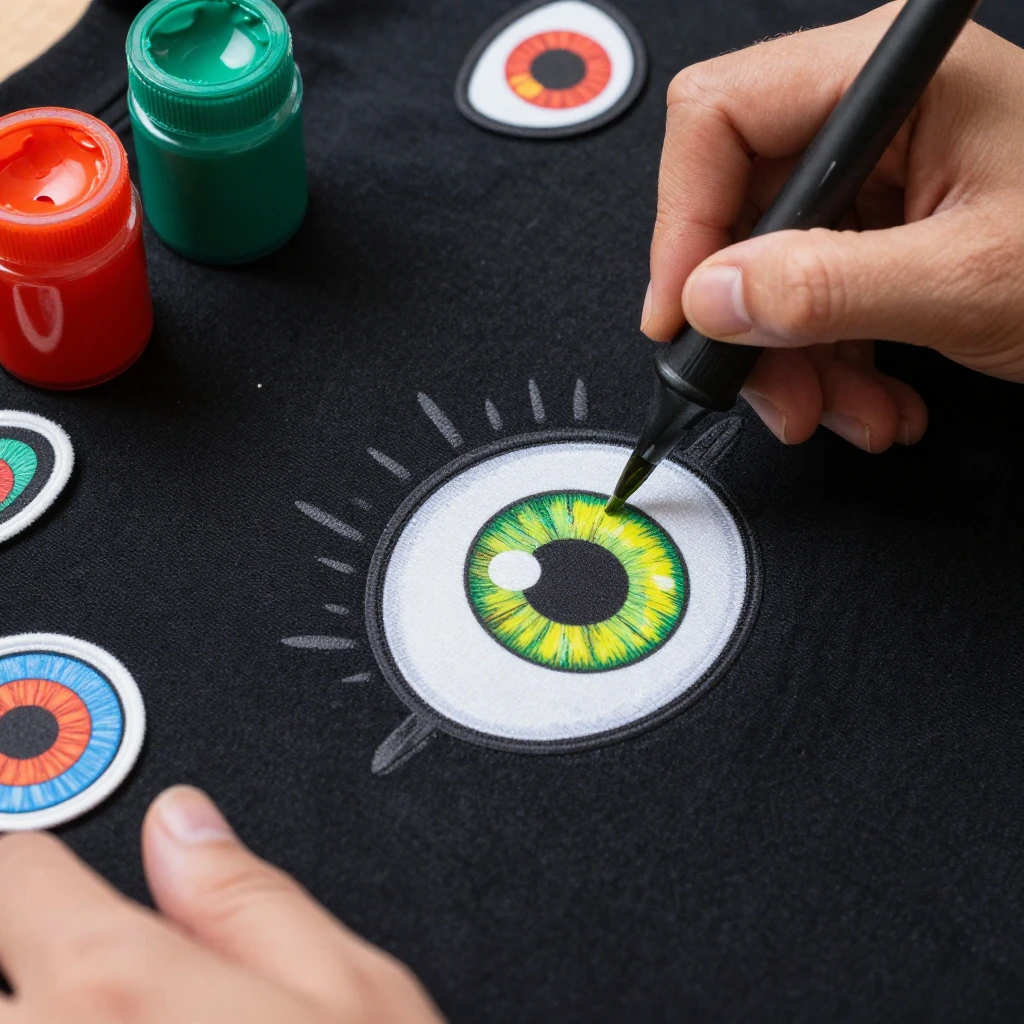
Resist the urge to fill every empty space. Letting some of the original garment show gives the design room to breathe and keeps the piece easy to pair with everyday clothes.
Customize the Shape and Texture
Adjust hems, sleeves, and layers to give old clothes a relaxed, oversized streetwear feel. Make small changes first, since cutting fabric is permanent and can affect how the garment hangs.
Try the garment on over the layers you expect to wear beneath it. If the hoodie already has a roomy fit, preserve its shape and focus on details such as a longer T-shirt hem underneath. For a standard T-shirt, rolling the sleeves or leaving the hem loose can change the silhouette without cutting. You can also layer a long-sleeve shirt beneath a short-sleeve graphic tee for a low-risk, oversized look.
If you want to crop or distress a piece, mark the cut while wearing it, then take it off before using scissors. Cut a small amount at a time and try it on again. A raw edge may curl or fray depending on the fabric, so test on a hidden area or scrap first. Avoid cutting through ribbed cuffs, neckbands, or load-bearing seams unless you are prepared to finish or reinforce them.
Texture can come from layering as much as from damage. A patch over a worn spot, a contrasting fabric panel, or a few hand stitches can make the garment look deliberately lived-in. Keep the silhouette comfortable: an oversized look should allow easy movement, not rely on a size that pulls at the shoulders or restricts your arms.
Finish, Care for, and Style Your Piece
Check that paint has cured and patches and seams are secure before wearing your finished piece. Follow each product’s care label, then style the garment with simple everyday staples so the monster details stay in focus.
Inspect the front and back in good light. Look for paint that feels tacky, loose patch edges, dangling threads, or cuts that may keep fraying. Let everything dry or cure for the full time listed by the manufacturer. If fabric paint requires heat-setting, use the stated method and temperature rather than guessing; too much heat can damage a print or synthetic fabric.
For the first wash, turn the garment inside out and use the care instructions for the fabric and materials you added. A gentle cycle and air-drying can reduce wear on paint and adhesive, though the product label takes priority. If the piece combines materials with different care needs, follow the most delicate instruction. Recheck patches after washing and repair a loose edge before it peels further.
For streetwear styling, pair a monster hoodie with relaxed jeans or cargo pants, then add sneakers and a plain cap. A graphic T-shirt works over a long-sleeve layer, with loose trousers balancing a large chest design. Keep the rest of the outfit relatively quiet if the garment has bright colors or a big motif. The result should feel like something you want to wear on an ordinary day, not only for a costume event.
Frequently Asked Questions
What old clothes work best for a DIY streetwear project?
Sturdy cotton or cotton-blend hoodies, T-shirts, denim jackets, and sweatpants are practical choices. Pick a garment that fits the way you want and has sound seams; worn fabric can add character, but very thin areas may tear when painted, stitched, or distressed.
How can I add monster designs without sewing?
Use fabric paint, fabric markers labeled for clothing, or iron-on patches. Follow the product instructions and test on a hidden area first. Paint is flexible for custom shapes, while patches make it easy to add a defined motif without drawing one by hand.
How do I make the finished piece look oversized?
Start with a roomy garment or layer a long-sleeve top beneath a graphic T-shirt. Pair a loose top with relaxed-fit bottoms, and keep the hem and sleeves comfortable. Cutting a smaller shirt wider or longer is difficult without sewing, so choose the silhouette before you customize.
How should I care for fabric paint or iron-on patches?
Follow the care instructions supplied with the paint or patch, since curing time, wash temperature, and ironing needs vary. Turning the garment inside out and air-drying can help reduce friction and heat, but the manufacturer’s directions should guide care.